
Learn how to whitelist emails in Gmail, Apple Mail, and Outlook to ensure important messages land in your inbox, not spam or promotions.
On GMail
On Desktop:
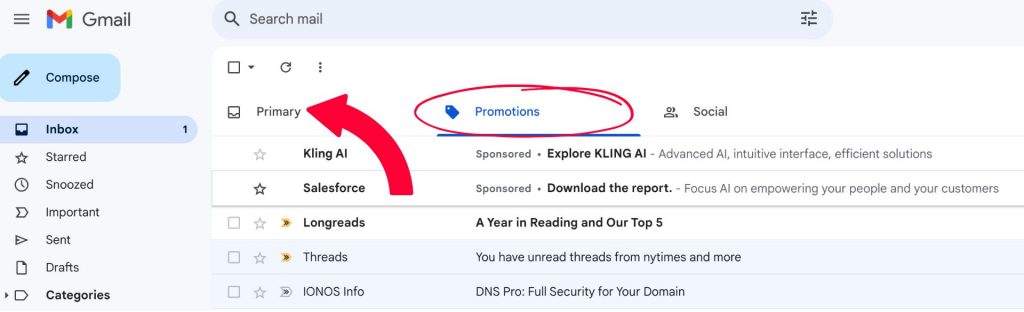
- Find the email in the “Promotions” or other tabs.
- Drag it to the “Primary” tab.
- When prompted, click Yes to apply this for future emails.
On Mobile (Gmail App):
- Open the email.
- Tap the three dots in the top-right corner.
- Select Move to > Primary.
Unfortunately, Gmail on mobile doesn’t prompt to apply this change automatically, so to ensure all future emails are whitelisted, consider setting up a filter via desktop. Go directly to that section at the bottom of this blog.
Apple Mail on desktop and iPhone/iPad:
On Desktop (Mac):
- Find the Email: Open the email you want to whitelist.
- Add to Contacts:
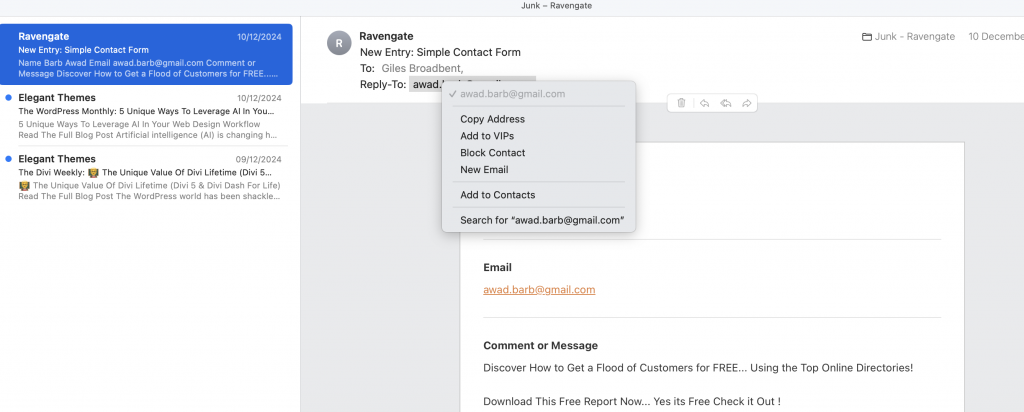
- Right-click on the sender’s email address.
- Select Add to Contacts or Add to VIPs.
- Mark as Not Junk (if needed):
- If the email is in the Junk folder, open it and click Move to Inbox.
By adding the sender to your Contacts or VIPs, their emails will bypass the Junk filter.
On iPhone/iPad:
- Find the Email: Open the email in the Mail app.
- Add to Contacts:
- Tap the sender’s email address at the top of the message.
- Tap Add to Contacts (or Create New Contact).
- Mark as Not Junk (if needed):
- If the email is in the Junk folder, open it, tap the folder icon, and move it to the Inbox.
Adding the sender to your Contacts ensures their emails won’t go to Junk.
Outlook on desktop and mobile:
On Desktop (Outlook for Windows/Mac):
- Find the Email: Open the email you want to whitelist.
- Add to Safe Senders:
- Right-click the sender’s email address or the message.
- Select Junk > Never Block Sender or Never Block Sender’s Domain.
- Move Email to Inbox (if needed):
- If the email is in the Junk folder, right-click and select Move to Inbox.
This ensures future emails from this sender go directly to your Inbox.
On Mobile (Outlook App):
- Find the Email: Open the email in the Outlook app.
- Add to Safe Senders:
- Tap the sender’s name at the top of the email.
- Tap Add to Contacts or similar option (varies by version).
- Mark as Not Junk (if needed):
- If the email is in the Junk folder, open it, tap the three dots in the top-right corner, and select Mark as Not Junk.
Adding the sender to Contacts and marking their emails as “Not Junk” ensures future emails are delivered to your Inbox.
How to create a filter to whitelist a Gmail
Here’s a simple step-by-step guide to whitelist a promotional email in Gmail:
1. Find the Email You Want to Whitelist
- Open Gmail.
- Navigate to your “Promotions,” “Social,” or any other tab where the email might be.
- Locate the email you want to whitelist.
2. Mark the Email as Important (Optional)
- Right-click on the email or open it.
- Click the Label as Important (flag icon) if available.
3. Move the Email to the Primary Tab
- Drag the email from its current tab (e.g., Promotions) and drop it into the “Primary” tab.
- Gmail will ask if you want to do this for future emails from this sender.
- Click Yes to confirm.
4. Create a Filter to Always Allow Emails from This Sender
- Open the email.
- Click the three dots (more menu) in the top-right corner of the email.
- Select Filter messages like this.
- The sender’s email address should automatically populate in the “From” field.
5. Set the Filter Rules
- Click Create filter (at the bottom of the filter window).
- In the next screen, check Never send it to Spam and Categorise as Primary (if available).
- Optionally, check Also apply filter to matching conversations to apply the filter to existing emails.
6. Save the Filter
- Click Create filter to save your preferences.
Now, emails from this sender will always land in your Primary inbox and avoid spam filters.